I had a quiet day at home while Jocie and the kids were up at Black Creek so I experimented a little photographing backyard insects with my two macro lenses: the 105mm Micro Nikkor and a recently acquired 60 mm Micro Nikkor. I’ve used the 105mm for a couple of years now and am very happy with the results that I get with it, but I wanted to get a second macro lens for plant photography where a wider angle of view is often useful—the 60mm fills that need.
Both of these lenses are designed for Nikon’s FX cameras, but work perfectly well on the DX camera bodies. There are a couple of DX macro options, but when considering what to buy I thought that the build quality of the FX lenses was better and considered that they’re usable on both types of Nikon camera bodies. Since I’m hoping to upgrade to a full frame camera this year, it made sense to go with a FX lens.
One of the things I love about photography is that I’m always learning something new. A little advice—take the time to read the manual that comes with any lens or camera that you currently own. I neglected to do that when I bought my 105mm lens and was occasionally frustrated that it just wouldn’t focus close enough using the auto focus. After reading the manual for a new lens that I bought recently I took another look at the 105mm and realized that it was possible to manually focus closer than the auto focus was able to!
So with that new found knowledge, I headed out into our backyard garden to search out cooperative flies, wasps, and bees.
For the most part, insects don’t stick around and pose nicely for you unless they’re busy feeding. Even then, they’re often moving around too quickly and changing position too often to get good images. Some patience and lots of so-so images are part of the process. Thankfully, digital is a whole lot less expensive than film.
Micro Nikkor 105mm, f/2.8, VR
Because insects are skittish, the 105mm is a good option. You don’t have to get quite as close to the insects so they aren’t “flushed” as frequently. One of my first subjects was the ubiquitous green bottle fly. We’ve got neighbours on either side with dogs and cats and these flies lay their eggs on animal feces. I guess they’re just popping over the fence for a bit of a rest and maybe a water break and some shelter.
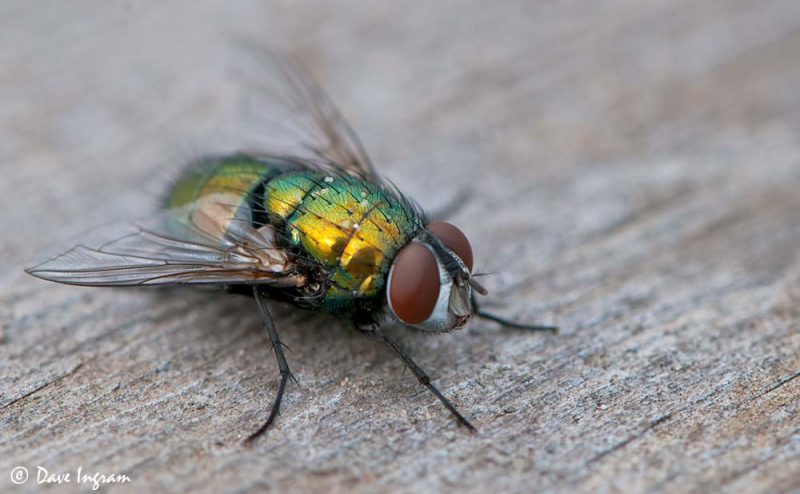
ISO 400, 105mm, f/13, 1/200s – minimal crop
I think that I should have used a smaller aperture (higher f-stop) to get a little more depth of field in this image and more of the fly sharp. I took several photographs of this fly and one where the camera was perpendicular to the insect was a bit sharper and more detail in the closest eye, but the composition was a little static.
My second subject is what I think is a western leafcutting bee. Fortunately, it was very focused on feeding and I was able to move in quite close without disturbing it.
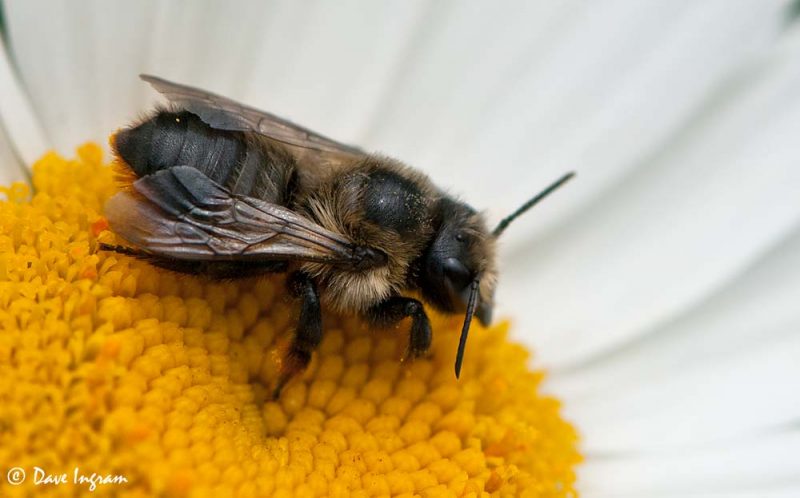
ISO 200, 105mm, f/8, 1/1000s – cropped
With this photograph I was able to use a lower ISO (with my “ancient” D80, anything over ISO 400 starts to produce noticeable grain when enlarged or cropped). It was a bit of a windy day so I went with a higher shutter speed to compensate. Again, a smaller aperture might have helped get a little more sharpness and depth of field.
One of my final subjects with the 105mm was a female golden-haired dung fly. In this case, I noticed it tucked onto a carrot leaf (perhaps taking a break from her important work next door). The fly was very cooperative so I was able to use a slower shutter speed. The 105mm’s VR might have helped a bit here as well.
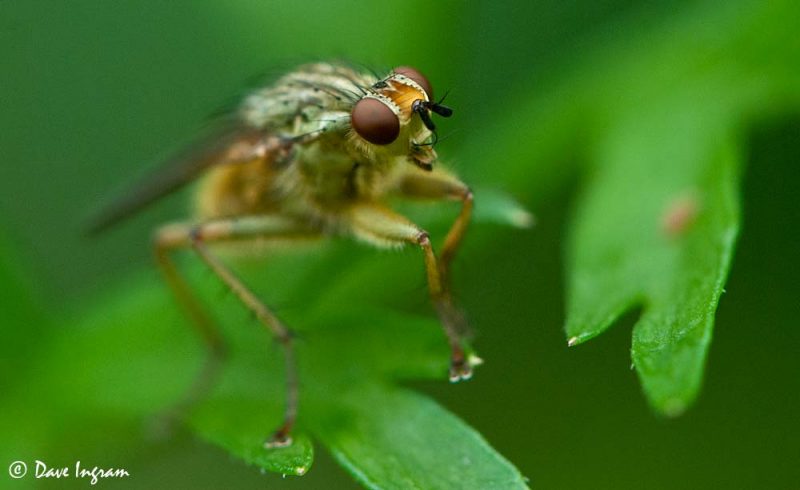
ISO 400, 105mm, f/10, 1/80s – cropped
A smaller aperture would have give me a more sharpness and detail in the body of the fly, but I think that I like how just the eyes and head are in focus and the background is soft.
Micro Nikkor 60mm, f/2.8
The 60mm is a little trickier to use since you have to be much closer to the insect in order to fill the frame. In addition, I find that the auto focus is pretty fickle and just can’t grab onto the subject. You’re better off to go with manual focus with this lens rather than waiting for the auto to figure things out. In addition, this lens doesn’t have a VR option so shooting at higher shutter speeds or using a tripod is a must. You also have to be very aware of where your light source is so that you don’t block it and create a shadow.
I found a very cool looking sawfly ichneumon wasp resting on some leaves and was able to get close enough to get a decent photograph.
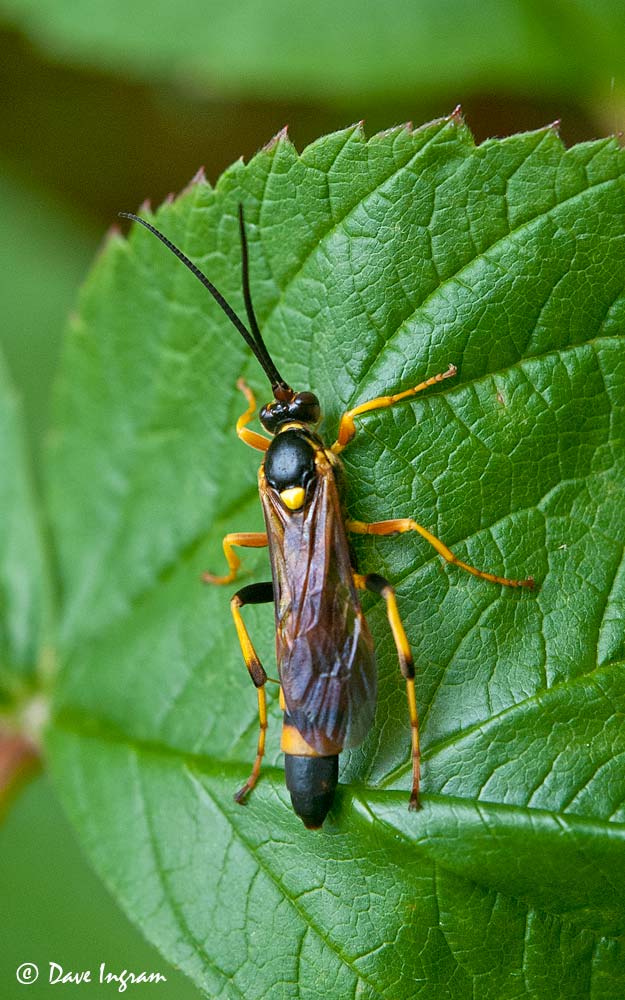
ISO 400, 60mm, f/8, 1/200s – cropped
Again, a little bit more depth of field could have helped to balance off the detail on the right side of the image with the softer left side. Pushing the ISO a little higher would have produced even more graininess in the photograph.
I was pretty happy with my final photograph, a bee feeding on a coreopsis flower.
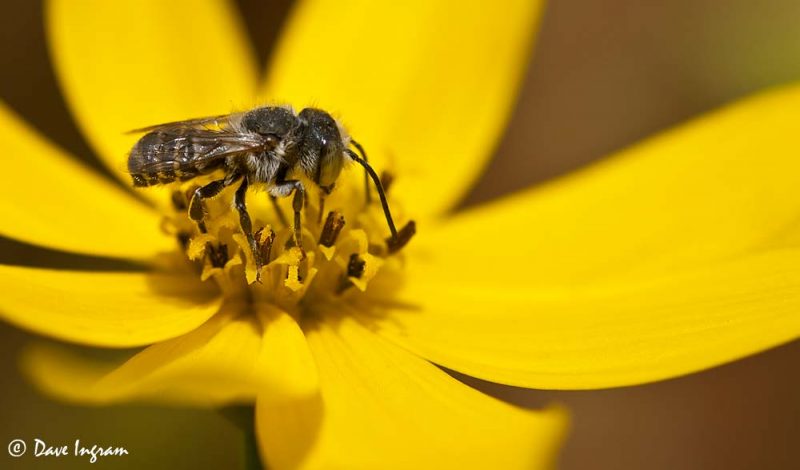
ISO 400, 60mm, f/8, 1/200s – cropped
Everything worked out pretty well here, I think because of the angle of the bee. The shallow depth of field softens up the background and because the bee is photographed from the side, all of it is sharp. The flower acts as a natural reflector so that bee was well exposed. A lower ISO would have been good, but a slower shutter speed wasn’t usable because of the wind. This is a cropped image.
Lots of variables to think about the next time I’m out in the garden. Overall, I’m going to continue to use the 105mm mainly for insect (and plant) photography. The 60mm seems better suited for “larger” subjects like wildflowers. It was challenging to get close enough to use it without creating a shadow or flushing the insect. There’s a little more leeway with flower photography! The 105mm has the advantage of extra reach and the VR if needed in less than ideal light. I haven’t had much success using the pop-up flash in the past and never use it, but maybe somewhere down the line I’ll look into getting some close-up flashes.
Until then, I’ll keep checking the depth of field using my camera’s preview button and try to change my camera position until I get the sharpness I’m looking for. Having a bit more latitude in terms of ISO would be awesome.